How To Integrate with Microsoft Graph API to Create Users from Azure Directory
Updated on Published on
Article summary
Integrate a Dazzm application with the Microsoft Graph API to enable searching and selecting users directly from your Azure Active Directory. Part 1 - Configuring the API Connection to Azure AD 1. Register the Azure App and Add Graph API Permissions Go to portal.azure.com and sign in to your Azure account
Part 1 - Configuring the API Connection to Azure AD
Section titled “Part 1 - Configuring the API Connection to Azure AD”1. Register the Azure App and Add Graph API Permissions
Section titled “1. Register the Azure App and Add Graph API Permissions”Go to portal.azure.com and sign in to your Azure account
-
Register a new Azure App and note the Tenant ID and Application (Client) ID — you will need these later.
-
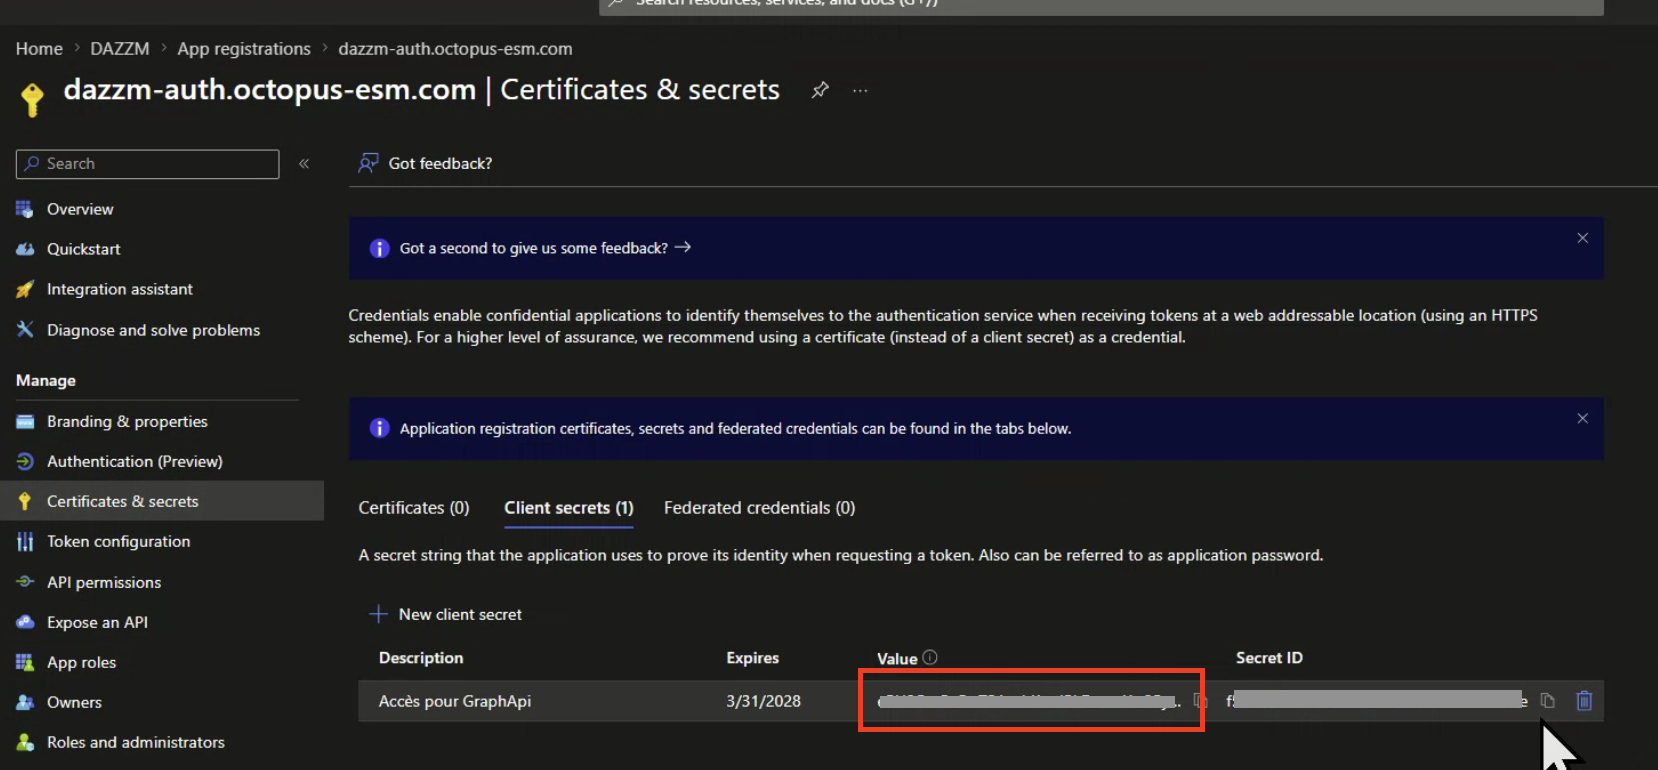
Create a new Client Secret, name it
Graph API, and set an expiration date.
-
Once created, note the Value of the secret immediately — it will not be visible again after you leave the page.
-
Under API Permissions, add the
User.ReadBasic.Allpermission and make sure to Grant Admin Consent.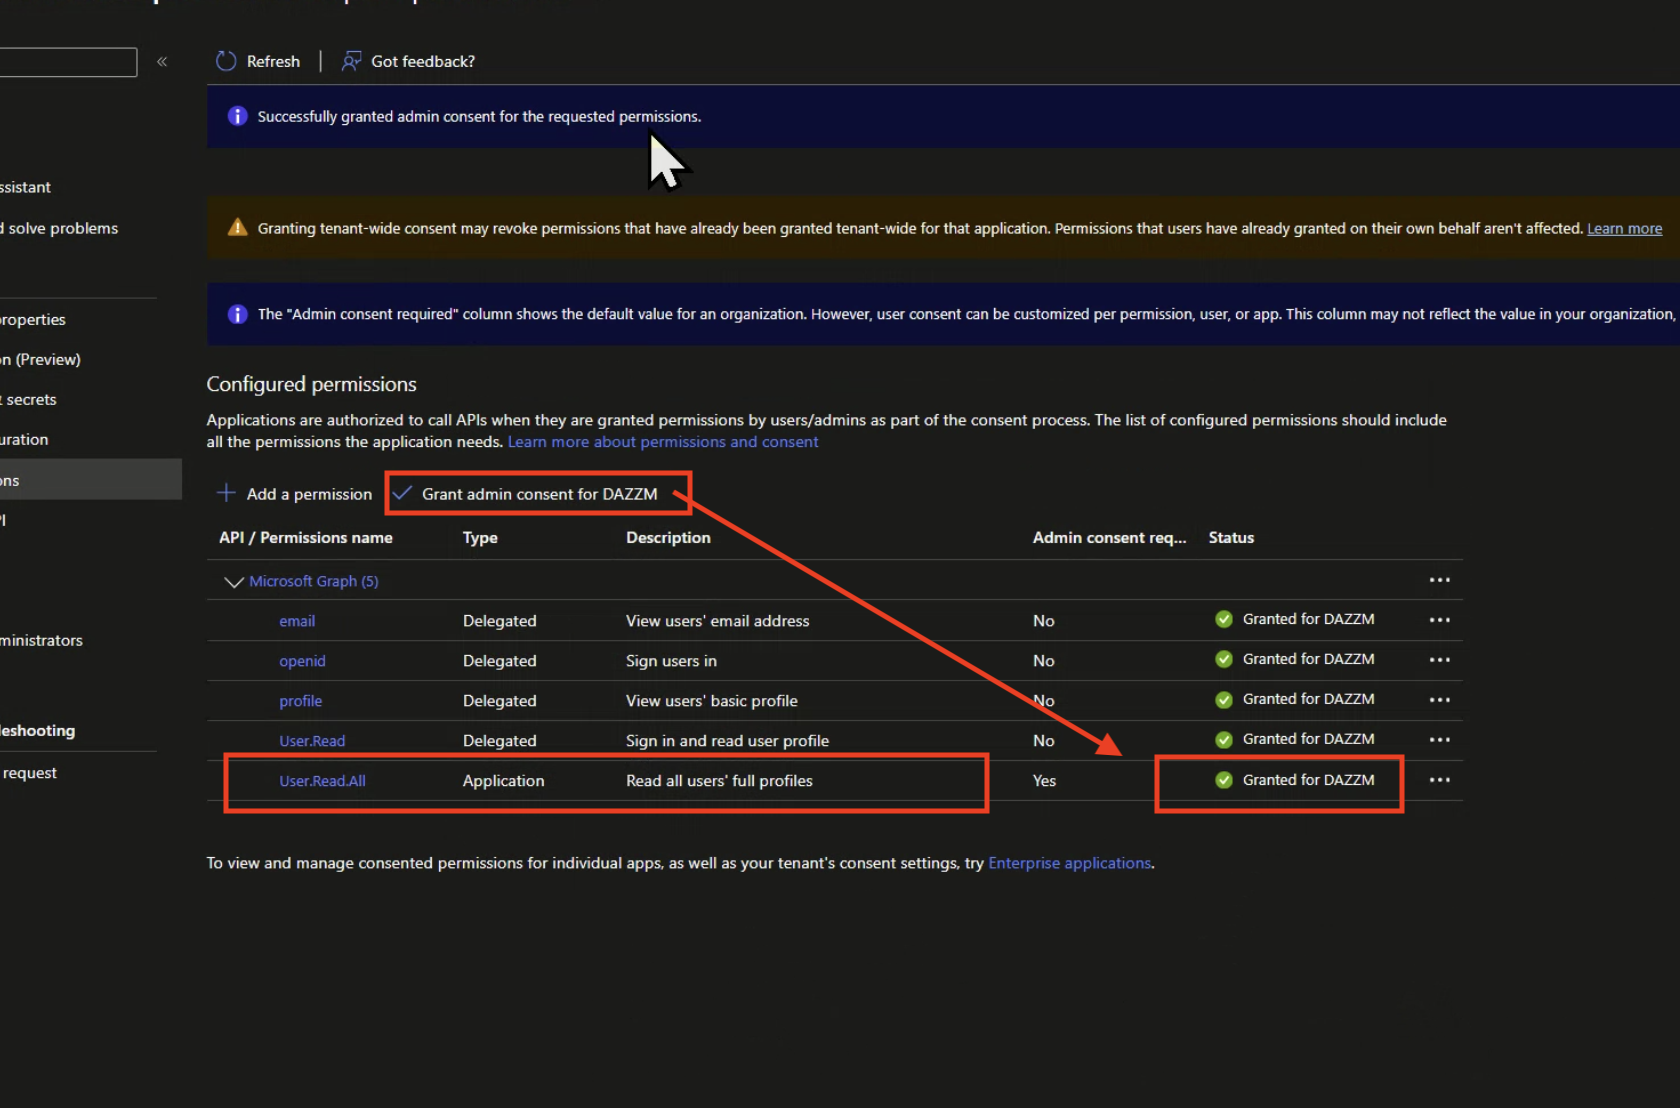
2. External API Connection (Account Level)
Section titled “2. External API Connection (Account Level)”In your account’s app configurations, add a new External API Connection.
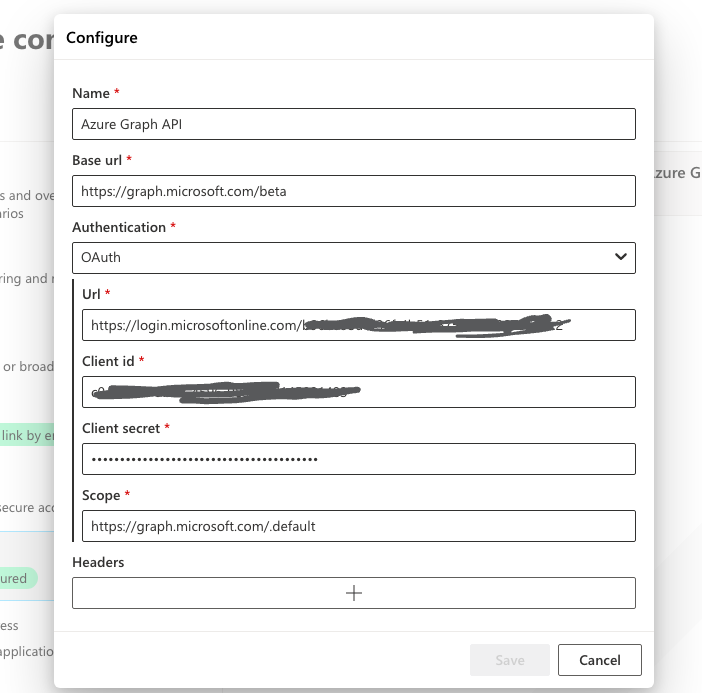
Using the information from the Azure App registration, configure the connection as follows:
Field
Value
Base URL
https://graph.microsoft.com/beta
Authentication
OAuth
URL
https://login.microsoftonline.com/<tenantId>
Client ID
<clientId>
Client Secret
<clientSecret> (the Value from the Azure secret)
Scope
https://graph.microsoft.com/.default
Note: The Client Secret field expects the Value generated by Azure when you created the secret, not the Secret ID.
Part 2 - Setting Up the User Search API
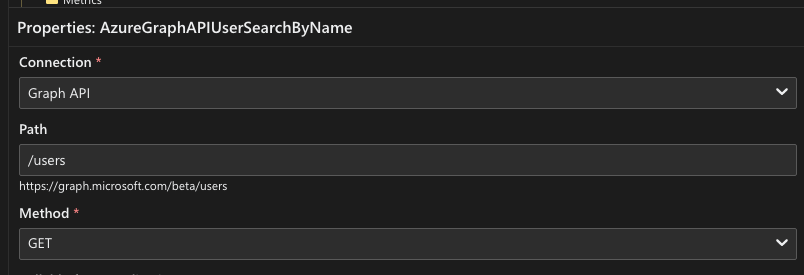
Section titled “Part 2 - Setting Up the User Search API”3. Create an External Application API for User Search
Section titled “3. Create an External Application API for User Search”Using the connection created in the previous step, create a new External Application API with the path /users :
Add the following parameters:
Parameter
Usage
Target
Type
Default Value
ConsistencyLevel
Header
—
Text
eventual
count
Query
$count
Bool
true
filter
Query
$filter
Text
(see code below)
search
Other
—
Text
const filters = ['accountEnabled eq true'];const searchCriteria = values.search?.trim();if (searchCriteria?.length > 0) { const encodedSearchTerm = searchCriteria.replace(/'/g, "''"); filters.push( `startswith(givenName, '${encodedSearchTerm}') or startswith(surname, '${encodedSearchTerm}')` );}return filters.join(' and ');select
Query
$select
Text
displayName, givenName, surname, mail, jobTitle, manager, company
top
Query
$top
Number
100
About the
searchparameter: It is not sent directly in the API request. Instead, its value is used inside the calculated default value offilterviavalues.search, which allows the filter to dynamically build the query string based on what the user is searching for. This builds a filter that always requires the account to be enabled, and optionally narrows results by first or last name when a search term is provided.
Once configured, you can use the built-in API test to verify the connection is working before moving on.
Part 3 - Using the API in the User Create Command
Section titled “Part 3 - Using the API in the User Create Command”4. Create a Module for the Azure User Search Dropdown
Section titled “4. Create a Module for the Azure User Search Dropdown”This module powers a searchable dropdown that can be used in dialogs to look up Azure AD users.
Create a new JS module with the following code:
/* Returns the configuration for the Azure AD user search dropdown */export default function dropdownAzureSearch(db) { const Collection = require('@skyjs/collection');
return { placeholder: 'Search for a user', onLoadOptions: async ({ searchTerm }) => { let adUsers = new Collection();
try { // Fetch matching users from Azure AD const data = await context.executeExternalApi("AzureGraphAPIUserSearchByName", { search: searchTerm });
adUsers = Collection.from(data.value) // Exclude users with no first or last name .reject(u => !u.givenName || !u.surname) .take(25) .map((adUser) => ({ email: adUser.mail, jobTitle: adUser.jobTitle, firstName: adUser.givenName, lastName: adUser.surname, displayName: `${adUser.givenName} ${adUser.surname} (${adUser.mail})` })) // Exclude users with no email .reject(user => !user.email) .map(user => ({ value: user, label: user.displayName }));
} catch (ex) { // If the API call fails, continue gracefully with an empty list console.error(ex); }
return Collection.from(adUsers); },
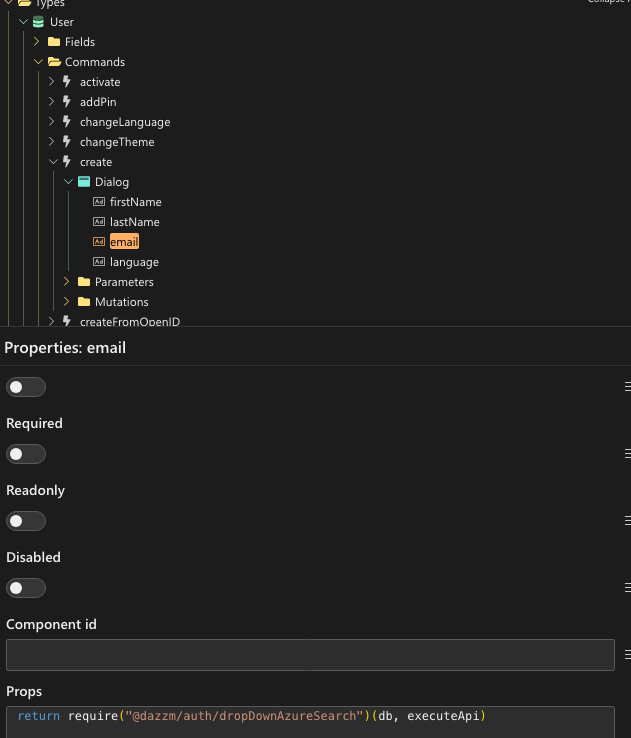
SelectedOptionComponent: ({ data }) => { // Displays the selected user's label in the field return data.label; } };}5. Add the Module to the Email Field
Section titled “5. Add the Module to the Email Field”Add the module created above to the props of the email command’s field (in the dialog).
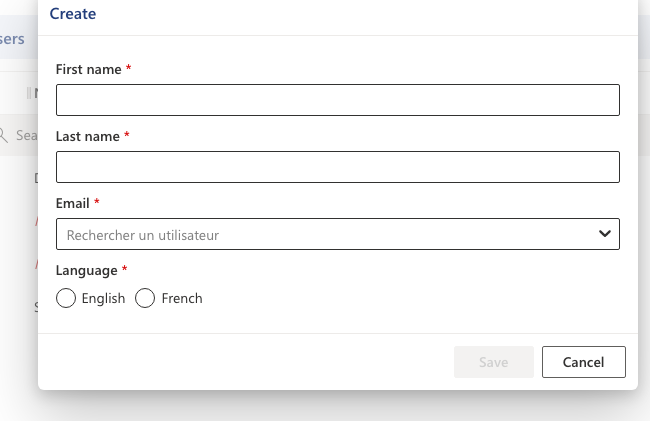
At this point, the Azure user search is already functional in your dialog.
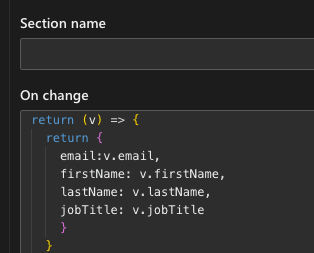
6. Handle the Selected User’s Data (onChange)
Section titled “6. Handle the Selected User’s Data (onChange)”When a user is selected from the dropdown, we want to map the fields of the returned object (form the API) to the form fields automatically. To do this, add the following code to the onChange of the email parameter: